|
|
Beach Buggy
Conversion/Build |
|
file= |
BeachBuggy |
|
| Introduction |
I bought a 1972 VW sedan, with a 1600 cc motor,
to convert to a Beach |
|
| Buggy. The
following people / firms were involved in the project :- |
|
|
|
|
|
|
|
|
|
|
|
|
|
|
| Beach Buggy
Australia. George & Clarke, 2/34 High Tech Dr., Kunda Park,
Ph=(07)5445-6459 |
|
| Supplied:- |
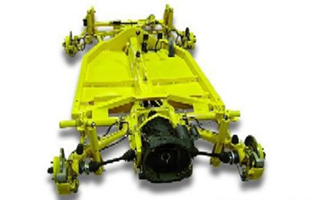
Rolling chassis, with reinforced perimeter and
disc brakes and suspensions all round. |
|
| BB Oz |
Fibreglass body, metal flake red plus
windscreen and glass, lights, instruments, wiring. |
|
|
Roll bars, side bars, bumper bars, steering
wheel, reconditioned transmission. |
|
|
| The customer
was responsible for the assembly of the above, prior to obtaining and
engineers |
|
|
| certificate and
registration. There was no instruction or assembly manual in the kit !! |
|
|
|
|
|
|
|
|
|
|
|
|
| Myself, John
Parjel, Civil Engineer extraordinaire, retired..,.. Ph=(07) 5474 3554 |
|
|
| This proved to
be a pleasant change from managing major high rise or industrial developments
! |
|
|
|
|
|
|
|
|
|
|
|
| Ross (the bike)
Simonsen, ex. racing mechanic for several bike racing teams in Europe. |
|
|
| Ross has had
vast experience in building, repairing and riding racing motorbikes and is
highly |
|
|
| experienced in
all areas of the motor repair business, particularly welding and making
things FIT. |
|
|
|
|
|
|
|
|
|
|
|
| Noosa Marine
Upholstery, Con & Mick, 38 Rene St. Noosaville, ph= 07 5474 2266 |
|
|
| Mick had the
difficult task of creating a custom canopy for weather protection. The major
problem |
|
| being the
raised sides of the body, which one had to clamber over to get inside. This
involved a tricky |
|
| cutout from the
roof section to enable entry and exit. They did the best job possible,
considering the |
|
| constraints.
Well recommended. Nevertheless, putting the side covers on or off is a fiddly
exercise. |
|
|
|
|
|
|
|
|
|
|
|
| Custom Offroad,
Peter Walshe, 28 Hayward St. Stafford,
07 3356 4356 |
Supplied and fitted |
|
| the Coil over
Shock absorbers, raising ground clearance to about 230+ all round.
Recommended. |
|
|
|
|
|
|
|
|
|
|
|
| AM auto
services, Noosaville, Alan & Miles, ph= 07 5455 5269 |
|
|
|
|
| Alan and Miles
did the subsequent Subaru engine conversion, at their Noosaville workshop.
Their |
|
| pride in their
workmanship was highly commendable. Never did they leave anything undone that |
|
| needed to be
done, and did much extra work, to ensure an excellent result. Highly
recommended. |
|
|
|
|
|
|
|
|
|
|
|
| Volks-Mod,
Gunther or Kurt, 4/22 Hutchinson St. Burleigh Heads, ph= 07 5593 5300 |
Did an |
|
| excellent job
getting all engineers and rego approvals, after minor modifications.
Recommended |
|
|
|
|
|
|
|
|
|
|
|
|
|
|
|
|
|
|
|
|
|
|
|
|
|
|
|
|
|
|
|
|
|
|
|
|
|
|
|
|
|
|
|
|
|
|
|
|
|
|
|
|
|
|
|
|
|
|
|
|
|
|
|
|
|
|
|
|
|
|
|
|
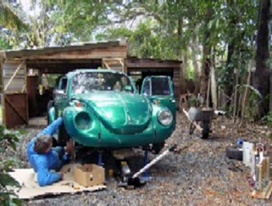
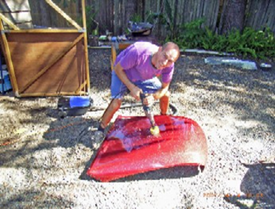
| The 1972 VW
beetle being stripped for delivery |
The chassis in BB Oz shop, being built. |
|
| as a
"donor" car to BB Oz. |
|
|
Workmanship is excellent. |
|
|
|
|
|
|
|
|
|
|
|
|
| After BB Oz
delivered the rolling chassis, body, bars etc. to my place, Ross and I
commenced the |
|
| assembly. We
had been warned that some of the parts would be hard to fit the first time,
requiring |
|
| use of
"spreader bars" and fitting and re-fitting, drilling and
re-drilling holes. This proved to be an |
|
| understatement.
The hardest part to fit was the dash frame, together with the bonnet and
windscreen. |
|
| These were
assembled, drilled, tapped, dis-assembled, bits welded on and sequence
repeated until |
|
| everything
looked right. We broke two windscreens in the process. |
|
|
|
|
|
|
|
|
|
|
|
|
|
|
|
|
|
|
|
|
|
|
|
|
|
|
|
|
|
|
|
|
|
|
|
|
|
|
|
|
|
|
|
|
|
|
|
|
|
|
|
|
|
|
|
|
|
|
|
|
|
|
|
|
|
|
|
|
|
|
|
|
|
|
|
|
|
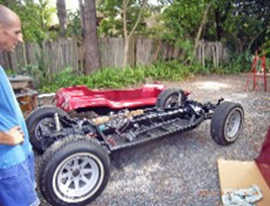
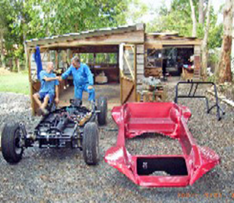
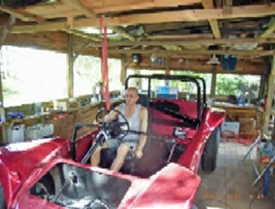
| Rolling chassis
+ body ready for assembly. |
|
Close up of rolling chassis & Ross the
bike. |
|
|
|
|
|
|
|
|
|
|
|
|
|
|
|
|
|
|
|
|
|
|
|
|
|
|
|
|
|
|
|
|
|
|
|
|
|
|
|
|
|
|
|
|
|
|
|
|
|
|
|
|
|
|
|
|
|
|
|
|
|
|
|
|
|
|
|
|
|
|
|
|
|
|
|
|
|
|
|
|
|
|
|
|
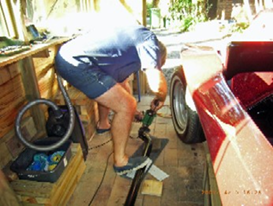
| Ross tapping
body/chassis fixing holes. |
|
Parj repositioning fuel filler tube on fuel
tank. |
|
|
|
|
|
|
|
|
|
|
|
|
|
|
|
|
|
|
|
|
|
|
|
|
|
|
|
|
|
|
|
|
|
|
|
|
|
|
|
|
|
|
|
|
|
|
|
|
|
|
|
|
|
|
|
|
|
|
|
|
|
|
|
|
|
|
|
|
|
|
|
|
|
|
|
|
|
|
|
|
|
|
|
|
| Ross positions
steering wheel/shaft on |
|
Seats have been fitted, and now we find we |
|
| dash frame.
Note the skyhook. |
|
|
have two (2) steering wheels. |
|
|
|
|
|
|
|
|
|
|
|
|
| End of session
1, time taken to date = 2 men, 3 days= 6 man days |
|
|
|
|
| Work still to
be completed, at end of session 1 :- |
|
|
|
|
|
| 1. Petrol tank
needs welding, fix new filler/close old. Cut filler hole in glass hood + seal
+ tank support. |
|
| 2. Install
instruments in dash panel, speedo, oil press. + temp. + battery voltage. |
|
|
|
| 3. Install
headlight, taillights, seat belts + warning light |
|
|
|
|
|
| 4. Final fix of
body to chassis & dash frame. Final fix of windscreen and new glass. |
|
|
|
| 5. Final wiring
to instruments, engine, lights, etc. |
|
|
|
|
|
| 6. Obtain
engineers certificate and register buggy !!! |
|
|
|
|
|
|
|
|
|
|
|
|
|
|
|
| I imagine it
will take another month or so, depending on how much time Ross the Bike can
take off |
|
| his normal job.
It may be useful if we/BB Oz could prepare an assembly manual, together with
photos |
|
| and diagrams
for future use. More photos and narrative in next week or so. |
|
|
|
| ============================================================================== |
| Session 2,
commence Wed 4 Apr-07, end Thurs 5-Apr-07. |
|
|
|
|
|
|
|
|
|
|
|
|
|
|
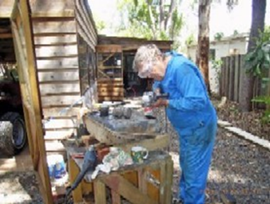
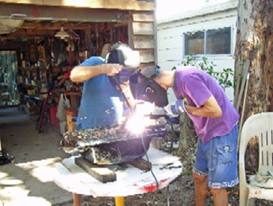
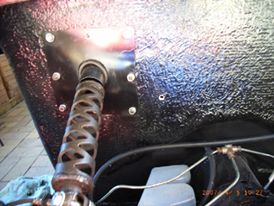
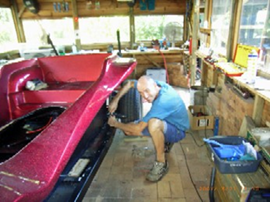
| Fuel tank
welding and installation. |
The old filler tube was drilled & cut out
and re-welded in |
|
| the centre of
the tank, to appear central when the bonnet was closed. Took the usual
precautions for |
|
| tank welding,
by rinsing out many times, then leaving tank as full of water as possible.
Even then, we |
|
| applied a flame
attached to the end of a stick, to confirm NO explosive vapours around when
welding. |
|
| Fuel lines
leaving tank will be armour covered, to prevent leaks from rubbing against
moving steering |
|
| rods. Fuel vent
will do a complete lap around tank to prevent leakage on roll-over. (thanks
George !) |
|
|
|
|
|
|
|
|
|
|
|
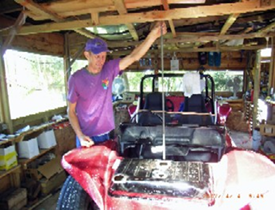
| We found an
easy method of locating the hole in the bonnet for the fuel filler cap, which
was blind |
|
| when the bonnet
was on. Simply hang a plumb bob from the ceiling above the centre of the
filler cap, |
|
| then put on the
bonnet in final position and mark hole saw centre from plumb bob. Simple and
easy. |
|
|
|
|
|
|
|
|
|
|
|
|
|
|
|
|
|
|
|
|
|
|
|
|
|
|
|
|
|
|
|
|
|
|
|
|
|
|
|
|
|
|
|
|
|
|
|
|
|
|
|
|
|
|
|
|
|
|
|
|
|
|
|
|
|
|
|
|
|
|
|
|
|
|
|
|
|
|
|
|
| Plumb Bob setup
being tested. |
|
|
Welding fuel tank. Full of water for safety. |
|
|
|
|
|
|
|
|
|
|
|
|
|
|
|
|
|
|
|
|
|
|
|
|
|
|
|
|
|
|
|
|
|
|
|
|
|
|
|
|
|
|
|
|
|
|
|
|
|
|
|
|
|
|
|
|
|
|
|
|
|
|
|
|
|
|
|
|
|
|
|
|
|
|
|
|
|
|
|
|
| Fuel filler
welded in new location, old hole sealed. |
Plumb bob located over fuel filler centre. |
|
|
|
|
|
|
|
|
|
|
|
|
|
|
|
|
|
|
|
|
|
|
|
|
|
|
|
|
|
|
|
|
|
|
|
|
|
|
|
|
|
|
|
|
|
|
|
|
|
|
|
|
|
|
|
|
|
|
|
|
|
|
|
|
|
|
|
|
|
|
|
|
|
|
|
|
|
|
|
|
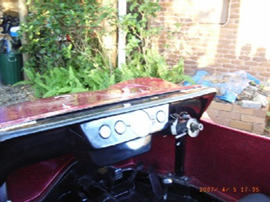
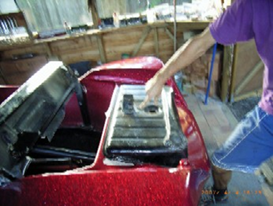
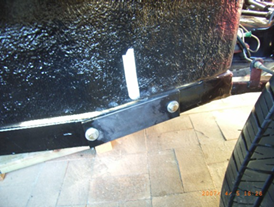
| Cutting fuel
filler hole in bonnet. Plumb bob |
|
Bracket to support full fuel tank in violent |
|
| located bonnet
hole centre. |
|
|
manoeuvres and jumps. (thanks George) |
|
| ============================================================================== |
| BB Oz advised
us to put a steel fuel tank support bracket under the front of the fuel tank.
It was felt |
|
| that under
severe driving conditions and a full fuel load, extra support was required
under the tank. |
|
| No doubt George
from BB Oz dropped several fuel tanks without this support, while desert
racing in |
|
| his reckless
younger days. |
|
|
|
|
|
|
|
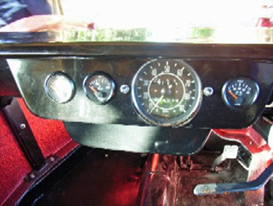
| Install
Instruments into dash panel |
Suitable holes were cut in the dash panel using
the |
|
| borrowed hole
saws from BB Oz. The speedo had to be right of centre and the other smaller
dials |
|
| for Oil
pressure, Oil temperature and battery voltage, were located where convenient. |
|
|
| The speedo was
a tight fit and several cuts had to be made, outside of the flat face area. |
|
|
|
|
|
|
|
|
|
|
|
|
|
|
|
|
|
|
|
|
|
|
|
|
|
|
|
|
|
|
|
|
|
|
|
|
|
|
|
|
|
|
|
|
|
|
|
|
|
|
|
|
|
|
|
|
|
|
|
|
|
|
|
|
|
|
|
|
|
|
|
|
|
|
|
|
|
|
|
|
|
|
|
|
|
| Instruments in
position for final seal. |
|
Another view of instrument panel. |
|
|
|
|
|
|
|
|
|
|
|
|
| Side bars
installation. |
The side bars came powder coated together with
fixing brackets |
|
| and plates. The
ends had to be wire brushed clean for welding to the chassis and to the
fixing plates. |
|
| We then made a
temporary support table to hold the bars in position, while the welding was
done. |
|
|
|
|
|
|
|
|
|
|
|
|
|
|
|
|
|
|
|
|
|
|
|
|
|
|
|
|
|
|
|
|
|
|
|
|
|
|
|
|
|
|
|
|
|
|
|
|
|
|
|
|
|
|
|
|
|
|
|
|
|
|
|
|
|
|
|
|
|
|
|
|
|
|
|
|
|
|
|
|
| Wire brushing
side bars & brackets for welding. |
Welding side bars and brackets to chassis. |
|
|
|
|
|
|
|
|
|
|
|
|
|
|
|
|
|
|
|
|
|
|
|
|
|
|
|
|
|
|
|
|
|
|
|
|
|
|
|
|
|
|
|
|
|
|
|
|
|
|
|
|
|
|
|
|
|
|
|
|
|
|
|
|
|
|
|
|
|
|
|
|
|
|
|
|
|
|
|
|
|
|
|
|
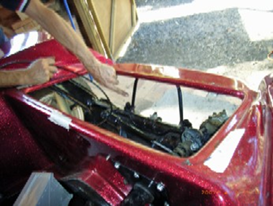
| Weld locations
marked by masking tape. |
|
Hole for speedo cable & details of steering |
|
| Also useful for
marking was office "whiteout" |
|
shaft seal fixing. Support fixed to cross bar. |
|
| ============================================================================== |
| Headlights,
taillights and turn indicators. |
The headlights were an easy installation,
merely |
|
| drilling 2
holes in the body, then bolting on the headlights and wiring into position
with parts provided. |
|
| The taillights
and rear turn lights were a standard item which fitted easy into the hole saw
cuts. |
|
|
| Seat Belts. |
These also were an easy installation as the
mounting bolt holes were already |
|
| in existence
with tapped threads into the main roll bars and chassis tunnel. |
|
|
|
|
|
|
|
|
|
|
|
|
|
|
|
|
|
|
|
|
|
|
|
|
|
|
|
|
|
|
|
|
|
|
|
|
|
|
|
|
|
|
|
|
|
|
|
|
|
|
|
|
|
|
|
|
|
|
|
|
|
|
|
|
|
|
|
|
|
|
|
|
|
|
|
|
|
|
|
|
|
|
| Rear view
showing tail lights & blinkers. |
|
Side view showing roll cage and side bars. |
|
|
|
|
|
|
|
|
|
|
|
|
|
|
|
|
|
|
|
|
|
|
|
|
|
|
|
|
|
|
|
|
|
|
|
|
|
|
|
|
|
|
|
|
|
|
|
|
|
|
|
|
|
|
|
|
|
|
|
|
|
|
|
|
|
|
|
|
|
|
|
|
|
|
|
|
|
|
|
|
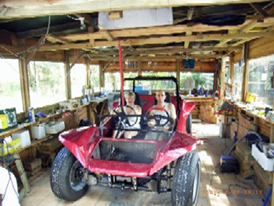
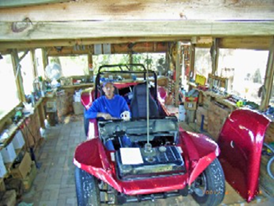
| Yollie &
Ross testing seats & view of Instruments. |
Side view at end of session 2. |
|
|
|
|
|
|
|
|
|
|
|
|
| End of session
2, TOTAL time taken to date = 2 men, 5 days= 10 man days |
|
|
|
|
|
|
|
|
|
|
|
|
|
| Work still to
be completed, at end of session 2, in say 1 weeks time :- |
|
|
|
| 1.0 Petrol Tank |
Needs cleaning & painting with rust
inhibitor & chassis black paint. |
|
|
|
|
Fix fuel lines (with armour), vent lines, fuel
gauge sender |
|
|
|
|
|
|
|
|
|
|
|
|
|
| 2.0 Fix body to |
Remove body, roll bars, bonnet, dash panel,
seats, seat belts. |
|
|
| Chassis. |
|
Apply spacers and sealant---Sikaflex, between
body and chassis. |
|
|
|
|
Then replace all above and final tighten all
bolts and fixings. |
|
|
|
|
Replace windscreen and fix into position. |
|
|
|
|
|
|
|
|
|
|
|
|
|
|
| 3.0 Wiring |
|
Layout main wiring looms and ensure all
instruments, items within reach. |
|
|
|
Fix wiring/fuse box into position above
passenger's feet. This box enables |
|
|
|
fuses to be examined/replaced without removing
hood or from beneath car. |
|
|
|
|
|
|
|
|
|
|
|
| 4.0 Engine. |
Bench test VW 1600 engine and tune dual throat
Weber carby's. |
|
|
|
|
Install engine and connect fuel, wiring, engine
controls. |
|
|
|
|
|
|
|
|
|
|
|
|
|
| 5.0 Misc. |
|
Final install of all lights, indicators,
mirrors, windscreen wipers/sprays, etc. |
|
|
|
Fix new steering shaft adaptor, previous one
did not fit shaft splines. |
|
|
|
|
Fit carpets and sound deadening mats to conceal
wiring runs. |
|
|
| ============================================================================= |
|
| 6.0 Return all |
BB Oz. Will check all tack welds, bars to
chassis etc. and do final welds. |
|
| to BB Oz :- |
Fit front & rear bumper bars and touch up
all steel left unpainted or exposed |
|
|
|
for welding. General check on all assembly and
build details and test fit the |
|
|
|
canopy and any other items, not completed to
date. |
|
|
|
|
|
Then BB Oz will have all the wiring connected
and tested by an experienced |
|
|
|
auto electrician and test all systems. Then, do
a shakedown road test. |
|
|
|
|
|
|
|
|
|
|
|
|
| 7.0 Engineers
Cert. |
A qualified and certified mechanical engineer,
Alan Marburg, will inspect the |
|
| and
registration. |
car in detail and provide a written
compliance/approval when satisfied. |
|
|
|
|
The car is then driven to the nearest QLD
registry office for issue of |
|
|
|
|
registration plates, ready for normal road use. |
|
|
|
|
|
|
|
|
|
|
|
|
|
|
| 8.0 Final
Photos |
Final finished photos of BUGGY and special
tools used. (eg: spreader bar etc) |
|
| ============================================================================= |
|
|
|
|
|
|
|
|
|
|
|
| SUMMARY |
The TOTAL time spent in actual
assembly/construction of the beach buggy by |
|
|
|
John Parjel and Ross the Bike was :- |
|
|
|
|
|
|
2 |
men by :- |
7 |
days= |
14 |
man days total. |
|
|
|
This time excluded time taken for looking and
shopping for tools, parts and |
|
|
|
materials and offcourse, time taken by BB Oz
and the auto electrician. |
|
|
|
|
|
|
|
|
|
|
|
|
| You would need
a workshop, with good natural light, preferably an area of say 6m long by 4m
wide |
|
| by 2.3m clear
height. Plenty of shelving and work benches are essential for tools, parts,
nuts & bolts. |
|
| It pays to have
a planned work schedule and don't be shy of making copious notes and
reminders. |
|
|
|
|
|
|
|
|
|
|
|
| Apart from
normal home workshop car tools, the following are, in our opinion, essential
:- |
|
|
|
|
|
|
|
|
|
|
|
|
|
* Two willing men, one at least an experienced
welder/handyman/repairer. |
|
|
|
* A gasless MIG welder plus decent air
compressor for air tools and cleaning. |
|
|
|
* Powerful angle grinder, for cutting steel and
a powerful sander/polisher with stainless |
|
|
steel circular wire brushes, for rust removal
and cleaning for welds. |
|
|
|
|
* A good 12mm drill with decent bits. Also
tapping bits, 12mm, 10mm, 8mm. (many break) |
|
|
* A "spreader bar" tool for lining
up/fitting body to chassis. See photos of 2 we used, one |
|
|
using a standard old VW jack, plus extension
pipes and end fittings. |
|
|
|
|
* Vacuum cleaner handy to remove fibreglass
dust when drilling or cutting holes. |
|
|
|
* A determination to make parts fit, that seem
impossible at 1st, 2nd or 3rd attempts !! |
|
|
|
|
|
|
|
|
|
|
|
| Registration,
Roadworthy & Engineers Certificate. |
After session 3 work was completed, in one |
|
| day, the buggy
was returned to BB Oz for their final checks, engineers certificate and
roadworthy. |
|
| There were some
problems in gaining the Engineers Certificate, because of some existing
issues |
|
| between Qld.,
transport, BB Oz and the certifying engineers. Therefore, after some lengthy
delays of |
|
| about 4 months,
it was decided to get all the statutory approvals at VolksMod workshop, where
there |
|
| were no
pre-existing issues to be resolved. After some minor modifications to the
rollbars, engine |
|
| covers and
painting over chromework, all the approvals were duly obtained, and the
vehicle was |
|
| legally
registered for use in Queensland. |
|
|
|
|
|
|
| ============================================================================== |
| By avoiding
some pre-existing issues, we were able to :- |
|
|
|
|
|
|
a) Retain the larger non-standard buggy wheels. |
|
|
|
|
|
b) Not having to replace the new disc brakes
all round with the original drum brakes. |
|
|
c) Not having to fill in the larger wheel
openings with blockouts. |
|
|
|
|
d) My buggy was considered to be modified, NOT
re-built, therefore the above lesser |
|
|
requirements were allowed. |
|
|
|
|
|
|
|
|
|
|
|
|
|
|
|
|
| Note :- |
If anyone is considering a short wheelbase
buggy, forget about it. The approvals then |
|
|
required would be the same as for a brand new
car, built after today's date.(Jesus wept!) |
|
| ============================================================================== |
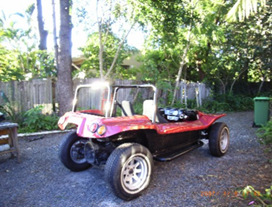
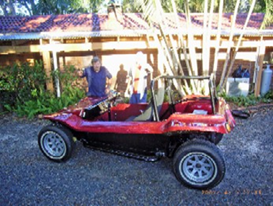
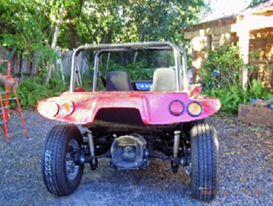
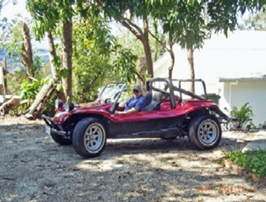
| Final photos,
after registration. Only canopy and new carby cover still to be finished. |
|
|
|
|
|
|
|
|
|
|
|
|
|
|
|
|
|
|
|
|
|
|
|
|
|
|
|
|
|
|
|
|
|
|
|
|
|
|
|
|
|
|
|
|
|
|
|
|
|
|
|
|
|
|
|
|
|
|
|
|
|
|
|
|
|
|
|
|
|
|
|
|
|
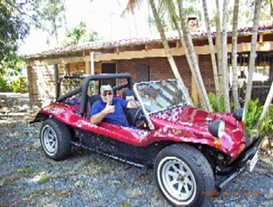
| In BB Oz
workshop for final checks and |
|
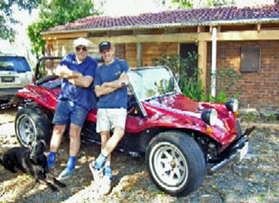
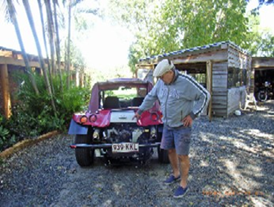
Parj and Ross, after rego. Long delays were |
|
| Qld. Transport
approvals. Ended up getting |
|
experienced in getting roadworthy and |
|
| rego approvals
at VolksMod, because of |
|
Engineers approvals. Ended up having to |
|
| pre-existing
issues with Qld. Transport. |
|
get another engineer for all approvals. |
|
|
|
|
|
|
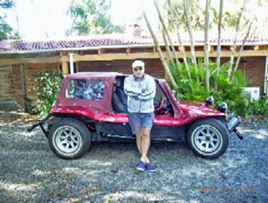
Still with VW 1600 cc motor, 65 hp. |
|
|
|
|
|
|
|
|
|
|
|
|
|
|
|
|
|
|
|
|
|
|
|
|
|
|
|
|
|
|
|
|
|
|
|
|
|
|
|
|
|
|
|
|
|
|
|
|
|
|
|
|
|
|
|
|
|
|
|
|
|
|
|
|
|
|
|
|
|
|
|
|
|
|
|
|
|
|
|
|
|
|
|
|
|
|
|
|
|
|
|
|
|
|
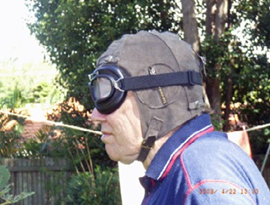
| Side view, note
the hat ! Bought one even |
|
Got the right headgear for the next hillclimb |
|
| more
"poncy" than this one. (with feather !) |
|
or rally. I get more comments/sas about the |
|
| Trying to buy a
leather flying helmet, from |
|
helmet, than I get about the Buggy !! |
|
| WW1 vintage.
Finally got one from USA. |
|
Many want to buy it at any price !! |
|
|
|
|
|
|
|
|
|
|
|
|
|
|
|
|
|
|
|
|
|
|
|
|
|
|
|
|
|
|
|
|
|
|
|
|
|
|
|
|
|
|
|
|
|
|
|
|
|
|
|
|
|
|
|
|
|
|
|
|
|
|
|
|
|
|
|
|
|
|
|
|
|
|
|
|
|
|
|
|
|
|
|
|
|
|
|
|
|
|
|
|
|
|
|
|
|
|
|
|
|
|
|
|
|
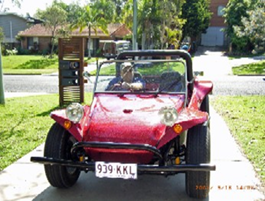
| Side view,
showing large wheels. |
|
|
Front view, with rego plates. |
|
|
| Disc brakes all
around were OK, as were |
|
Now for a more powerful motor !! |
|
|
| larger wheels
for beach/off-road. |
|
|
Maybe a Subaru or 2200cc VW stoker. |
|
| ============================================================================== |
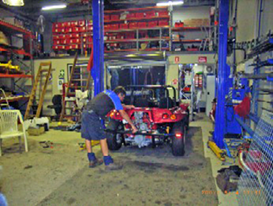
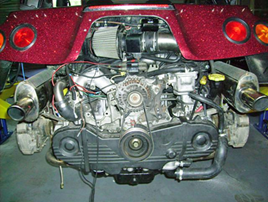
| Subaru Engine
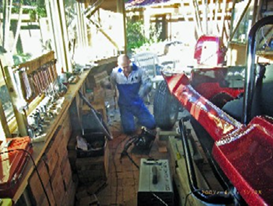
Conversion, by AM auto services, Noosaville. Ph=(07) 5455 5269 |
|
|
| After several
trial runs, it became obvious that the standard 1600 cc motor, even with dual
throat |
|
| Weber carby's
and extractor exhausts, was somewhat underpowered for "soft" sand
use. The |
|
|
| choices were to
soup up the VW motor, or do a Subaru motor conversion. The Subaru motor
option |
|
| was selected as
it gave good reliability with fuel injection and heaps of
"unstressed" surplus power. |
|
| Alan and Miles
of AM auto services, Noosaville, ph=(07) 5455 5269 did the conversion. They
used a |
|
| Liberty 2.2 lt.
Engine, from a 1995 Liberty Subaru, developing about 131 hp, vs 60 hp
original VW. |
|
| The engine was
examined and tested, and all gaskets/belts replaced. A readily available
adaptor |
|
| plate was used,
with purpose built radiator installed at the front, with associated pipes and
pumps. |
|
| Extra
instrumentation was used to suit the Subaru engine management computer.
Several clutches |
|
| were tried
before one was found strong enough to handle the extra power. (modified Kombi
clutch) |
|
| I was very
impressed with the standard of work done by Alan and Miles of AM motors. They
did not |
|
| take any short
cuts or leave anything undone, that needed to be done. Very highly
recommended. |
|
|
|
|
|
|
|
|
|
|
|
|
|
|
|
|
|
|
|
|
|
|
|
|
|
|
|
|
|
|
|
|
|
|
|
|
|
|
|
|
|
|
|
|
|
|
|
|
|
|
|
|
|
|
|
|
|
|
|
|
|
|
|
|
|
|
|
|
|
|
|
|
|
|
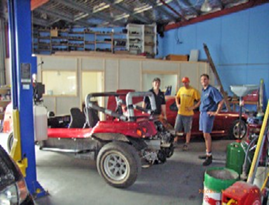
| 2.2 lt. Subaru
motor, as installed. (131hp) |
|
AM workshop, Alan and Miles.(Ross behind) |
|
|
|
|
|
|
|
|
|
|
|
|
|
|
|
|
|
|
|
|
|
|
|
|
|
|
|
|
|
|
|
|
|
|
|
|
|
|
|
|
|
|
|
|
|
|
|
|
|
|
|
|
|
|
|
|
|
|
|
|
|
|
|
|
|
|
|
|
|
|
|
|
|
|
|
|
|
|
|
|
|
|
|
|
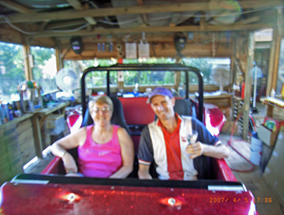
| Admiring the
Subaru installation. It sounds great |
Showing canopy, best result possible. Tricky |
|
| and feels as
grunty and lively as our 350Z |
|
to install/remove side panels. |
|
|
|
|
|
|
|
|
|
|
|
|
|
|
|
|
|
|
|
|
|
|
|
|
|
|
|
|
|
|
|
|
|
|
|
|
|
|
|
|
|
|
|
|
|
|
|
|
|
|
|
|
|
|
|
|
|
|
|
|
|
|
|
|
|
|
|
|
|
|
|
|
|
|
|
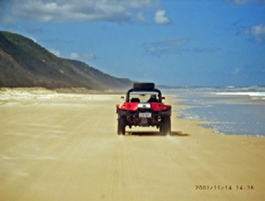
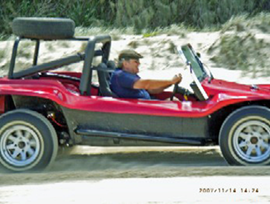
| Staring to
enjoy the fruits of all the labours. |
|
Handles soft sand with ease. Also gives |
|
| Look out
Simpson Desert, Cape York etc. |
|
most sedans a fright at the traffic lights !! |
|
| ============================================================================== |
|
|
|
|
|
|
|
|
|
|